
Chocolate LEGO MAN Cake Toppers!
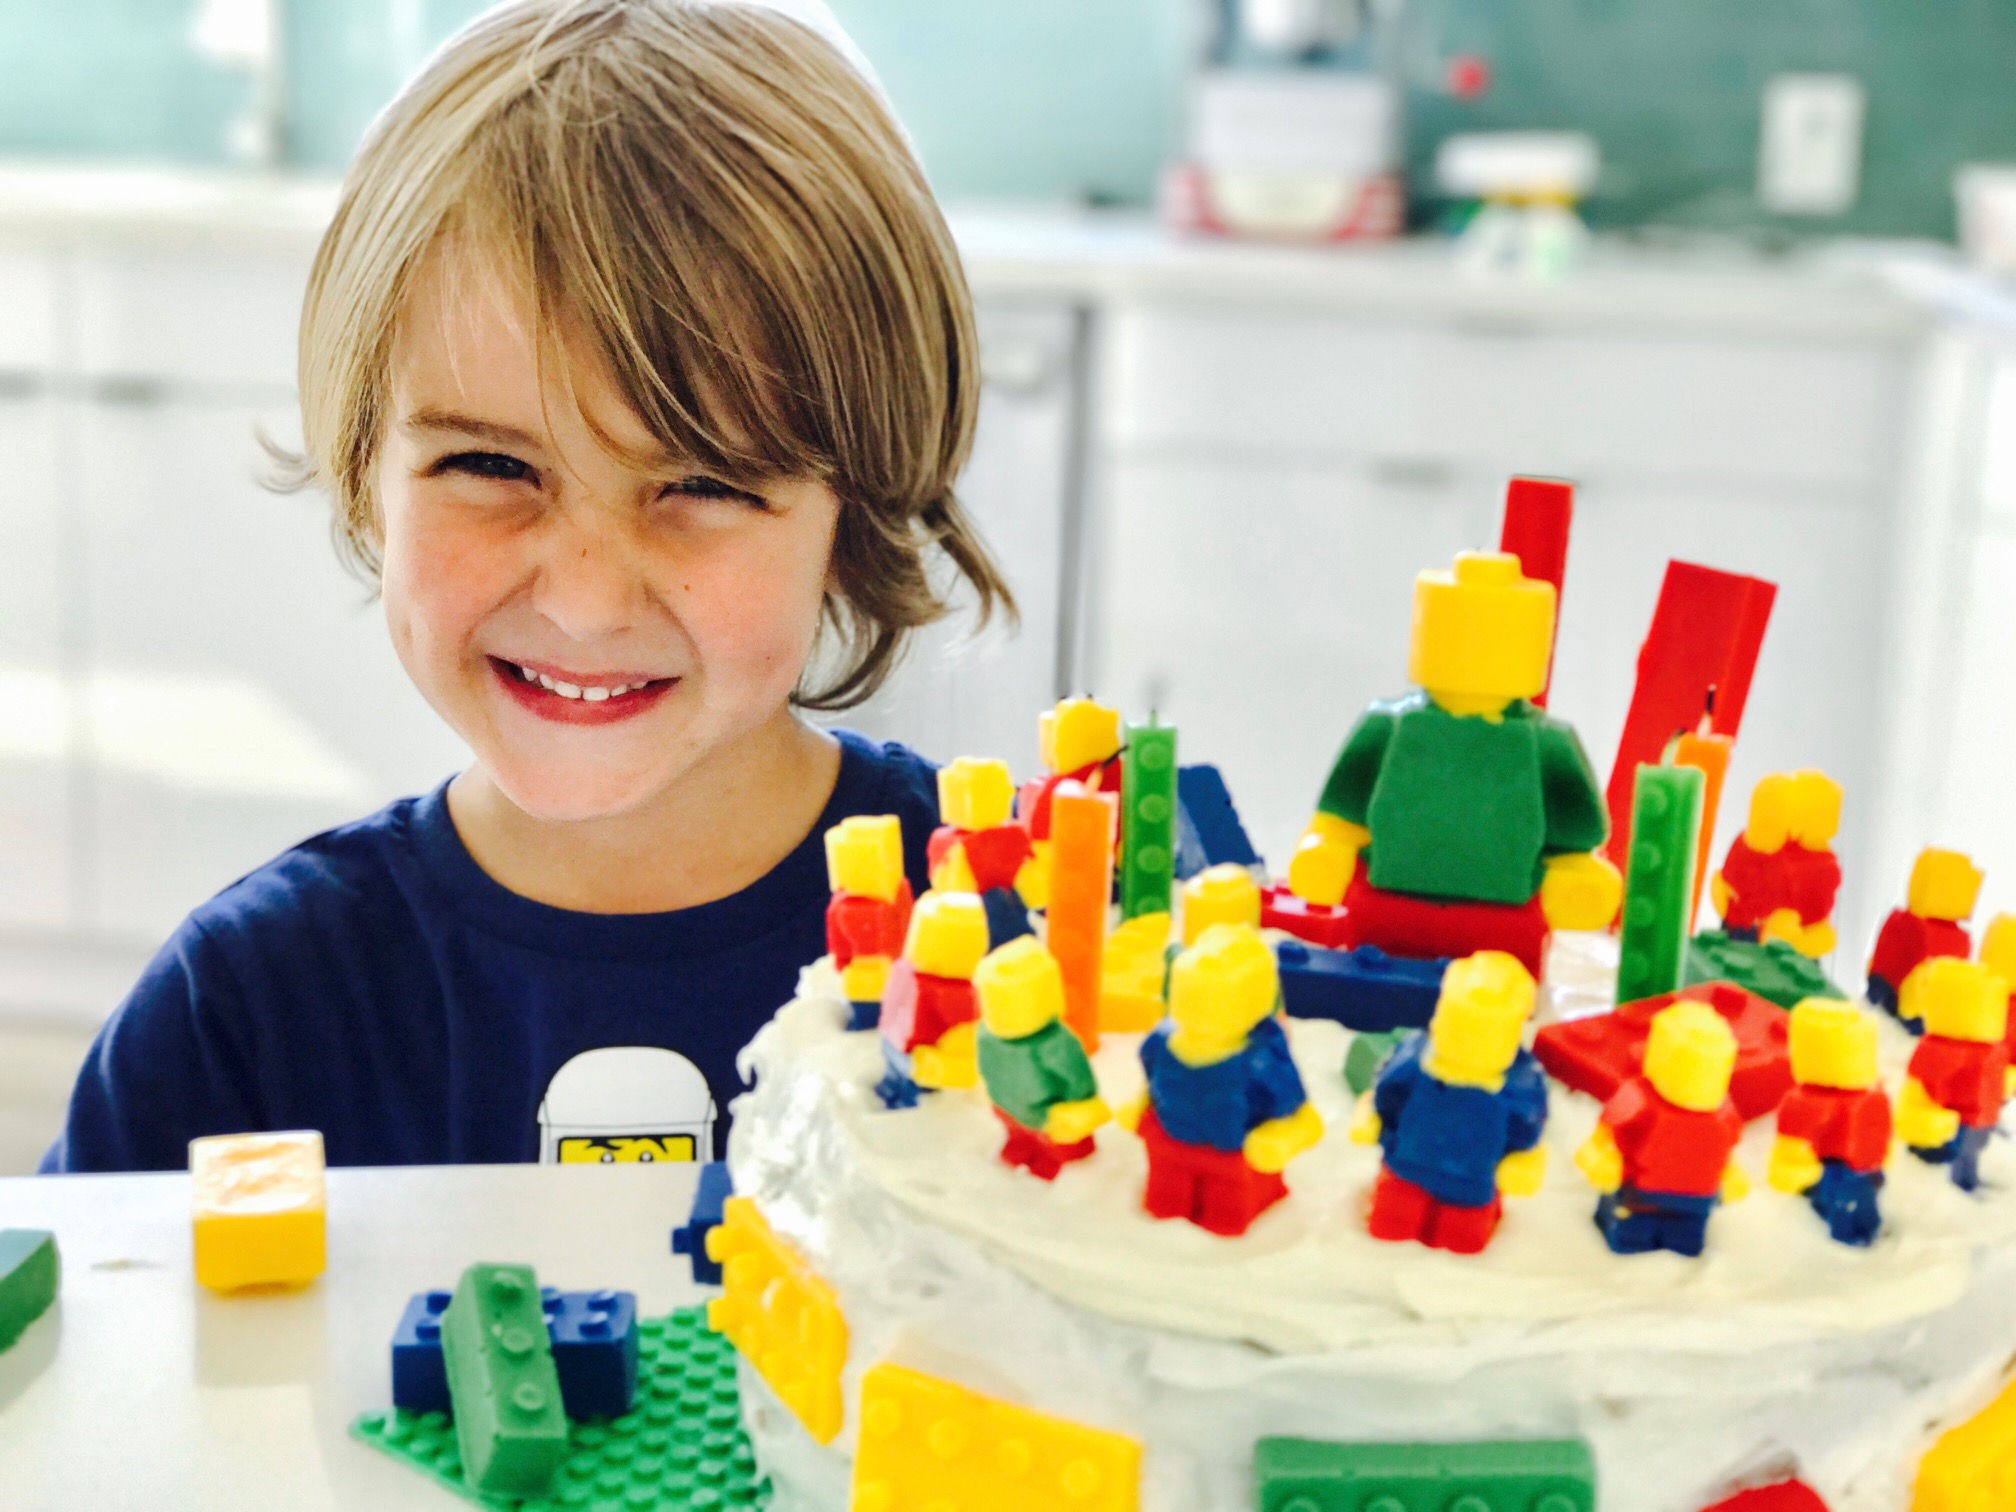
Nothing could have made me happier than seeing my now 5-YEAR-OLD get so excited for his LEGO birthday cake!

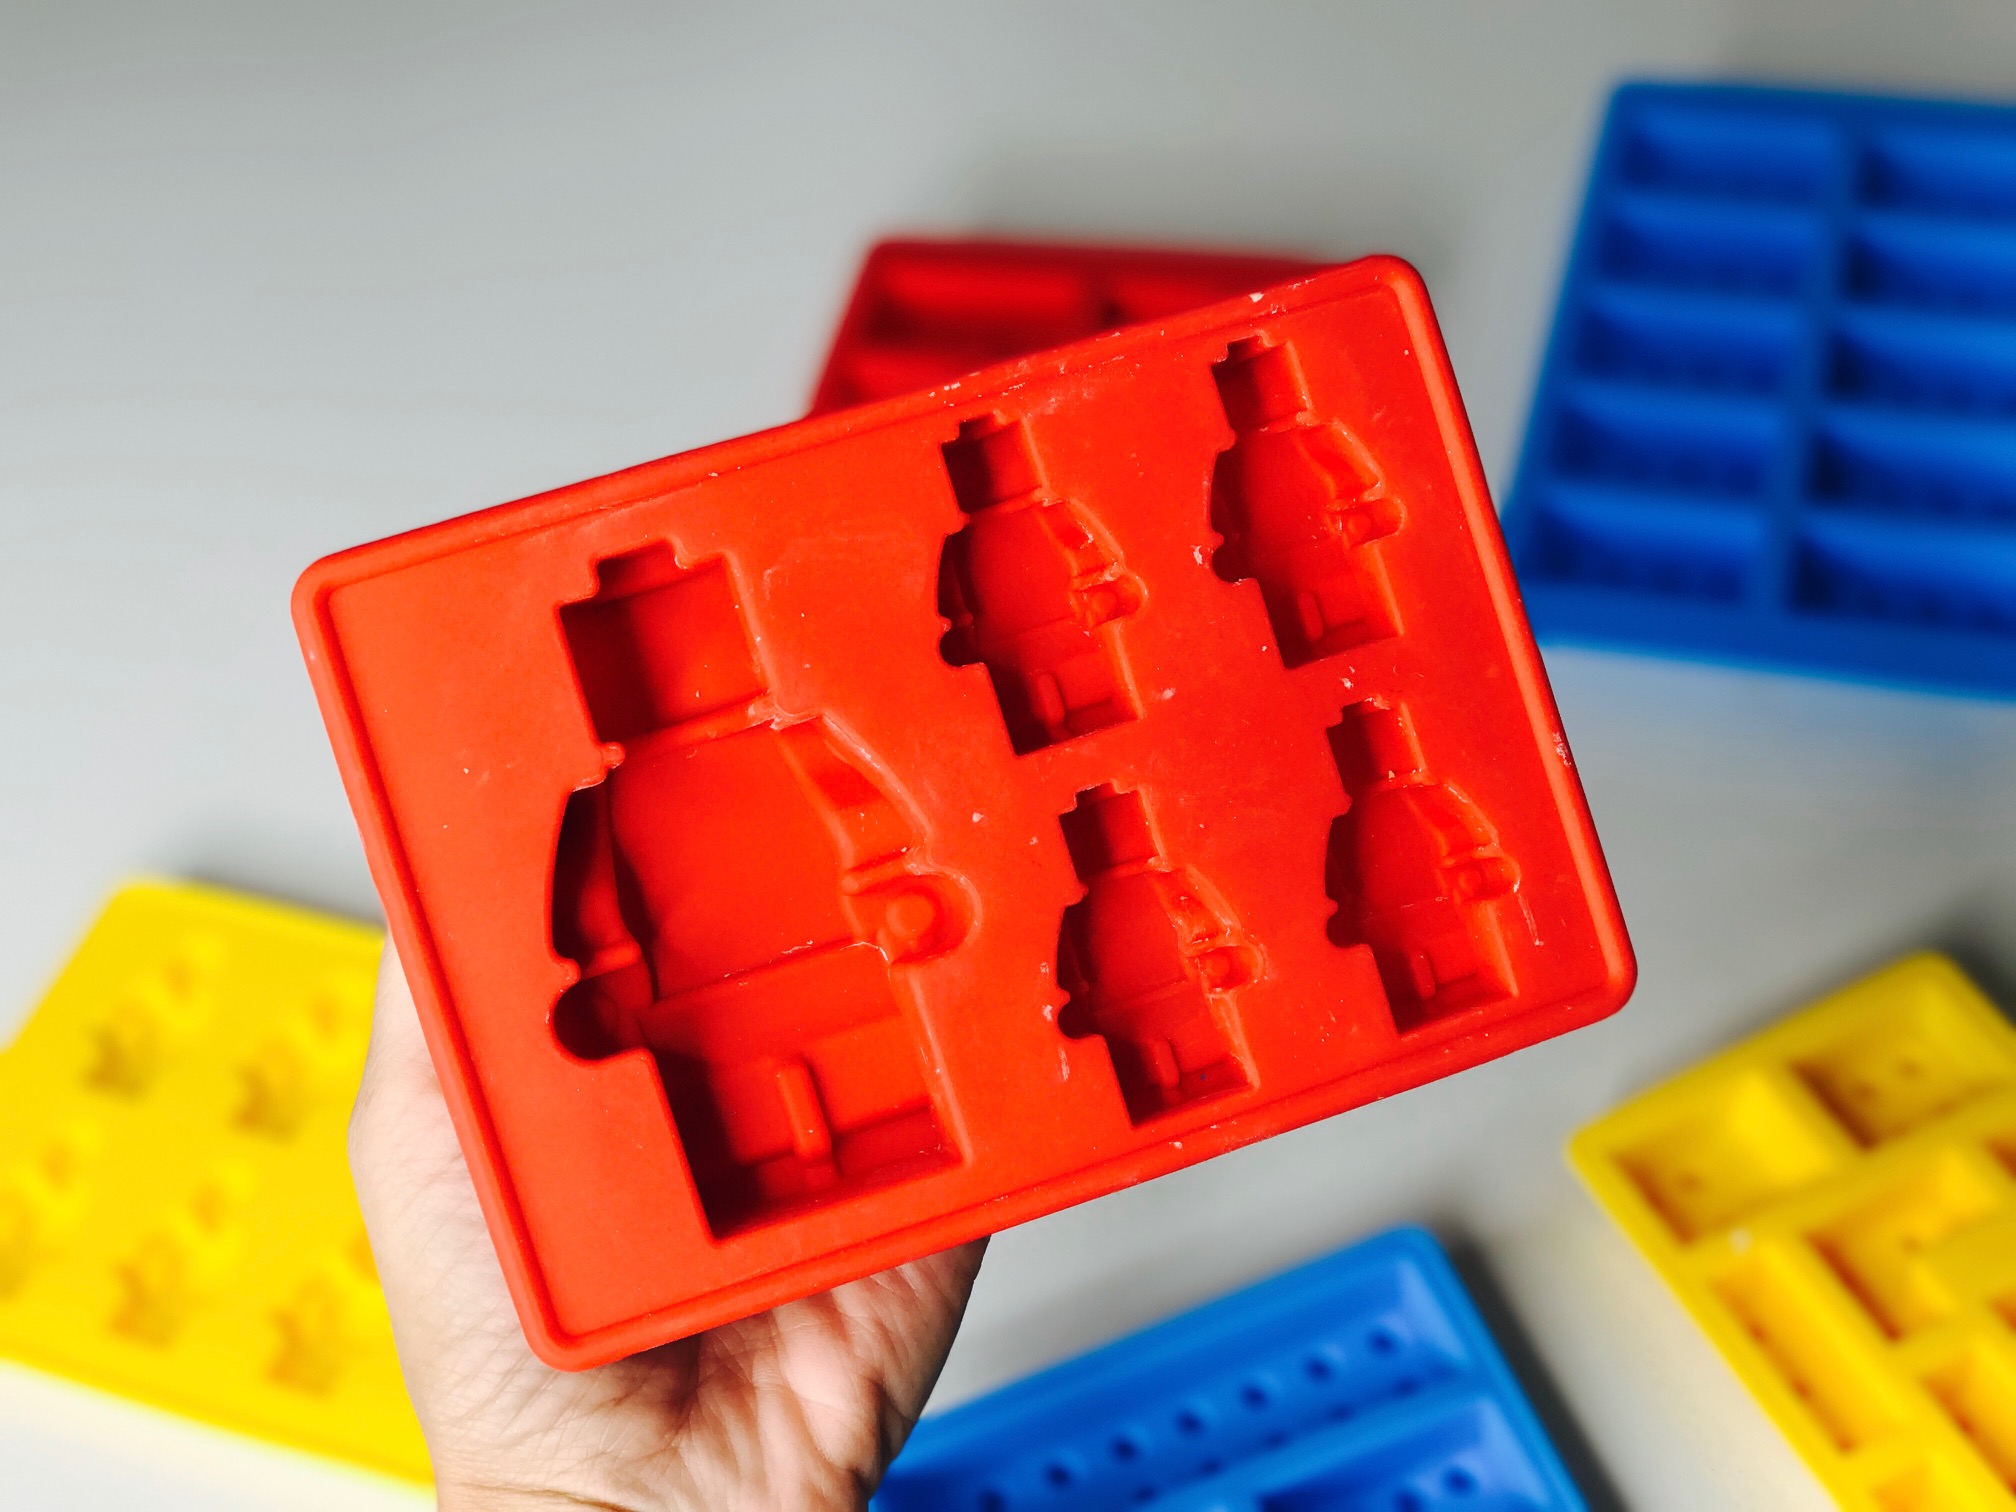
LEGO molds are the best! You can use these to make LEGO chocolates, crayons and even magnets!
It's Calvin's 5-year-old birthday, and this year he is requesting a LEGO cake! Of course, I could go buy one, but my midwestern roots are compelling me to bake that cake! For my son, much of his young life has revolved around LEGO, so this cake is a big deal. No pressure!!
The other day, we were making LEGO-shaped crayons, (I told you he is obsessed!) and it spaked an idea...What about a giant chocolate LEGO MAN??? I could top his cake with giant LEGO bricks and figures! I jumped onto Amazon, and found some really cool silicone molds and colored candy melts, and the rest is chocolate LEGO history!

You can make these LEGO chocolates a singular color - or mix it up and make it look like a real mini-figure!
Here's what you need...
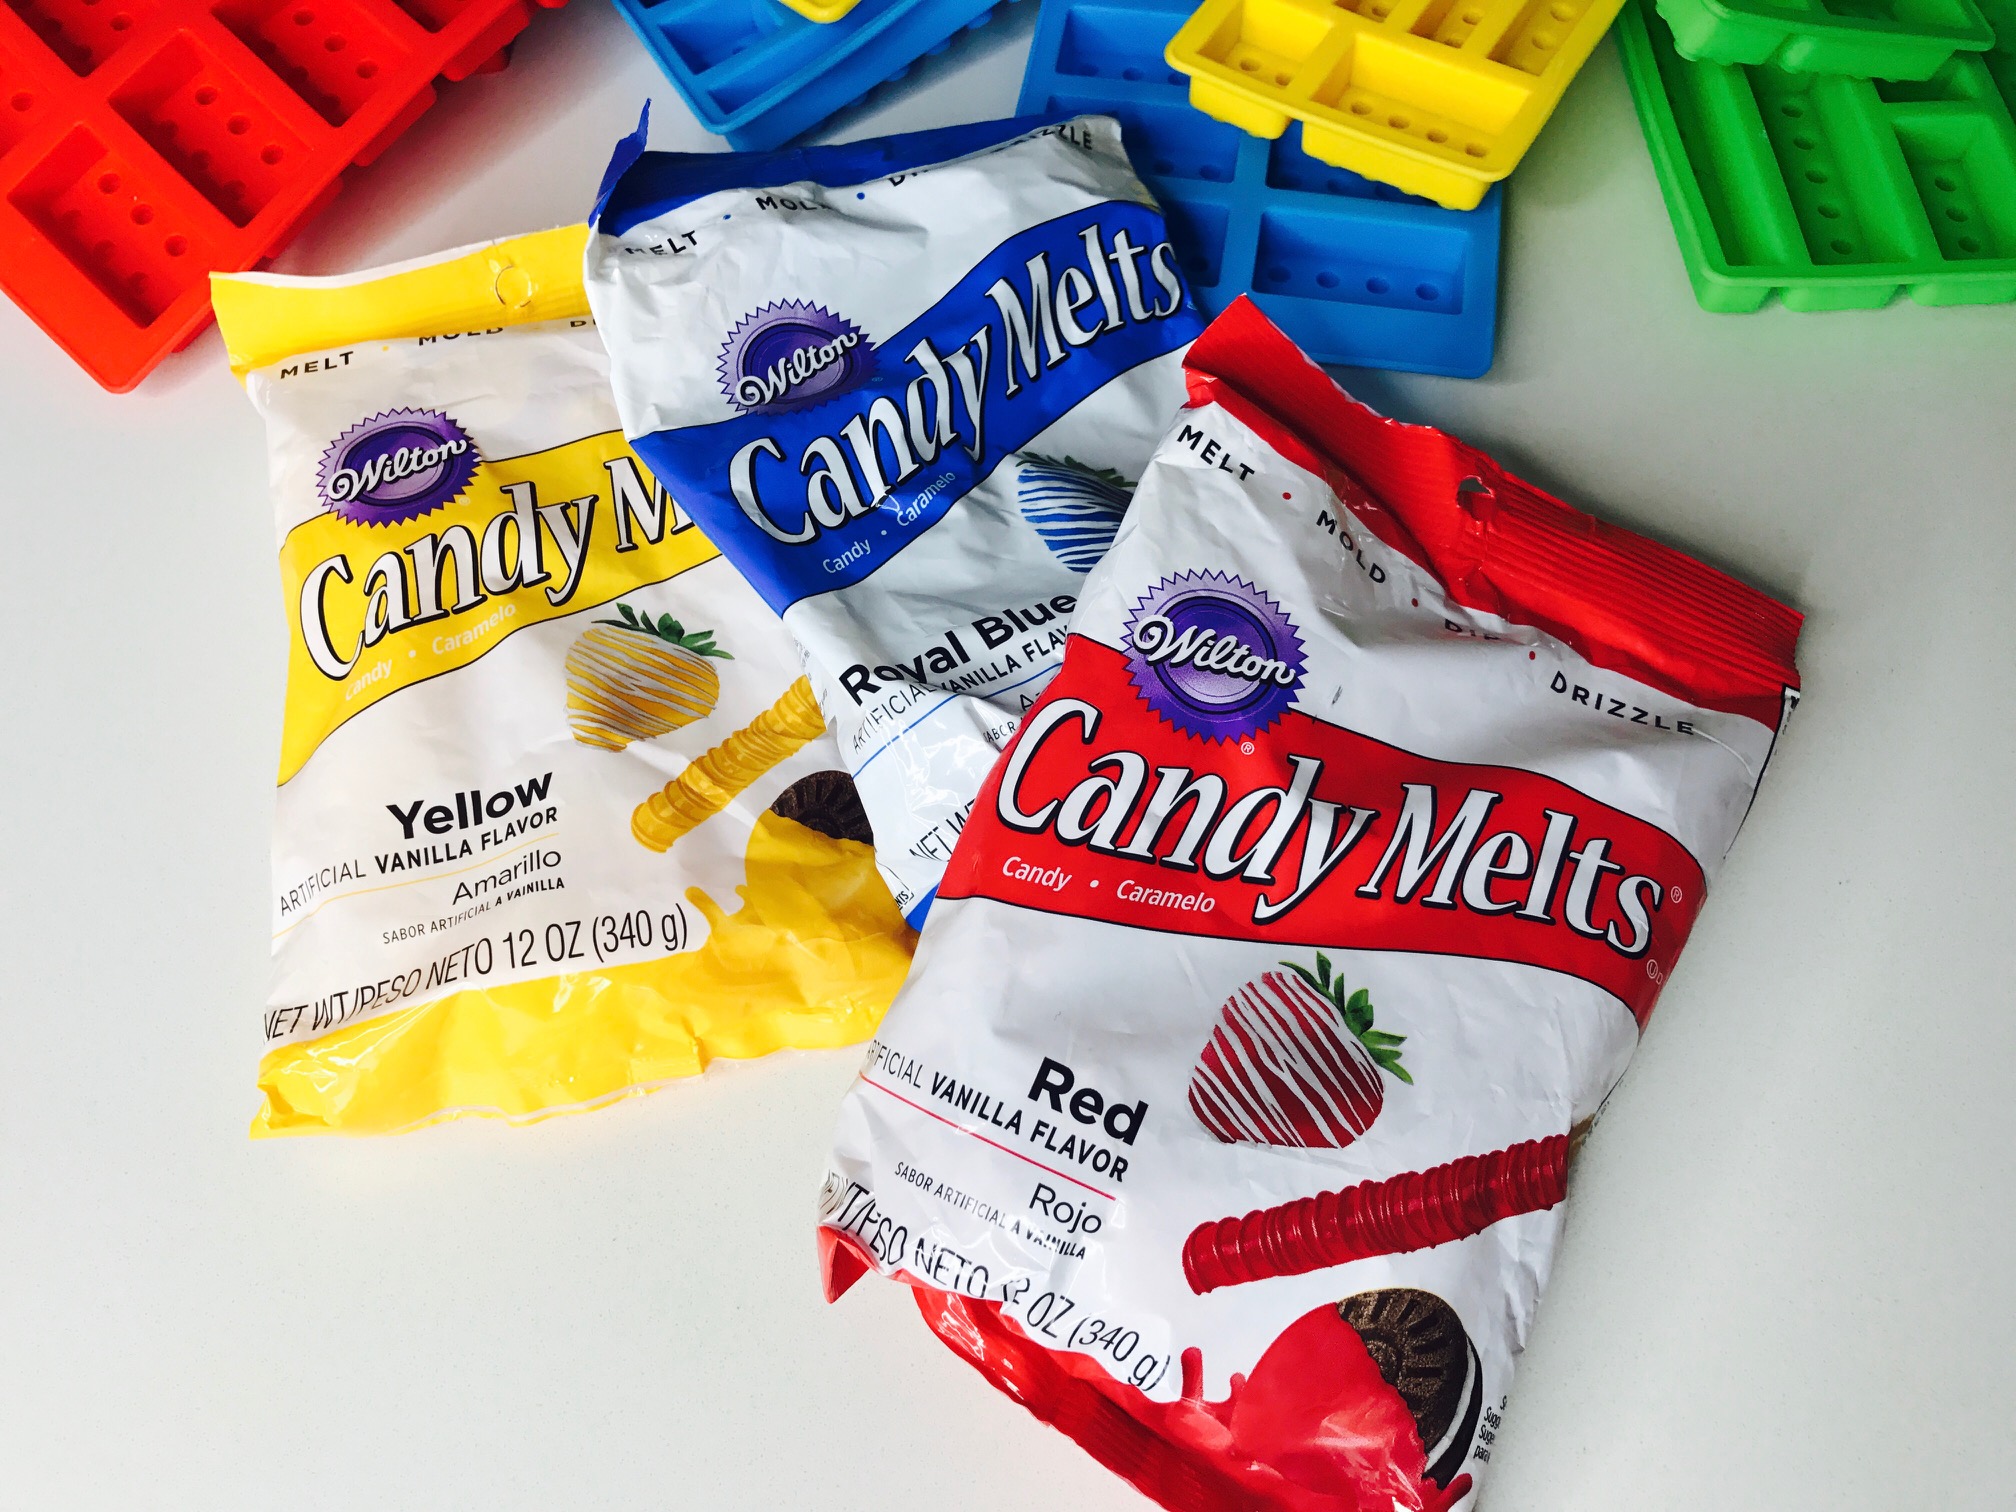
Candy melts are the best! Perfect for cake toppers and chocolate LEGOS!
- Candy Melts (One bag goes a long way! I bought Wilton brand)
- Silicone molds (Bricks and mini figures)
Here's how you make it...

Remember to stir the candy melts while the heat up in the microwave. It happens pretty fast!
- Start by heating the candy melts in a glass bowl. (Approx a half cup of candy melts.) Using a microwave, stir every 30 seconds for about two minutes, or until the chocolate is super smooth and completely melted. You can heat several colors at once, designating one spoon for each color.
- Carefully pour the melted chocolate from the glass bowl into small ziplock baggies.
- Using scissors, snip off a tiny corner of the baggie.

Ziplock baggies are perfect for piping chocolate.
LEGO Bricks...
- If you are making LEGO bricks, it's SO EASYQ Pipe the melted chocolate into the mold all of the way to the top. Tap the mold gently on the countertop to remove air bubbles.
- Then place into the refrigerator or freezer for 10 - 15 mins.
- Finally, remove from mold trays and enjoy!!

LEGO Mini-figures...
- If you are making LEGO mini figures, it's a little trickier! First, fill the head and hands halfway with yellow. Allow to set for 15 - 20 seconds. This helps the colors stay in place!
- Then pipe in the shirt - again halfway. Same thing for the pants.
- Starting with the yellow again, fill the head and hands to the top. Do the same for the shirt and pants.
- Gently tap the mold on the countertop. Consider using the back of a butter knife to smooth out the back if you added too much chocolate and want the backside of chocolate to appear smoother.
- Pop it into the refrigerator or freezer for 10 - 15 minutes, and they are ready to go!
- Remember to store in an air tight container.


After much back and forth, Calvin decided HE was going to decorate the cake all by himself! I LOVE how it turned out!! Best of all, SO DID HE! XOXO

And this says it all!!! Love this kid!! Happy birthday, Calvin!!

